Birds in flight
Birds in flight
In this Masterclass, wildlife photographer Paul Hobson shows four AP readers how to achieve eye-catching images of swans, ducks, geese and herons at Slimbridge Wildfowl & Wetlands Trust. Paul Nuttall reports

Capturing a sharp image of a bird in flight is one of the more difficult challenges facing the wildlife photographer. Not only do you have to take into account the speed and direction in which the bird is flying, but there are also issues relating to shutter speed, focus selection and exposure. Combine this with the white appearance of a swan and other birds, which throws up well-documented exposure challenges, and you?d be excused for thinking that an eye-catching image of a bird in flight was almost impossible to capture. However, as Paul Hobson assures us, with a bit of practice and by following a few simple tips, it?s easier than you may think.
The Wildfowl & Wetlands Trust (WWT) at Slimbridge is the perfect place to hone such skills. Founded by Sir Peter Scott, Slimbridge in Gloucestershire annually shelters large numbers of whooper swans in its grounds through the winter months. The wetlands themselves are also home to a wide array of other birds that lend themselves to the lens.

?A wide variety of birds will be present throughout the day, providing ample opportunity to practise your skills of capturing them in flight?, says Paul. ?However, the time when they will be at their most prolific is late afternoon ? this is when the birds will be making their way in from the surrounding areas where they have been feeding. It?s also when the light provided by the low sun serves perfectly in lighting up the underside of the birds.?
With this in mind, we head off into the grounds of the WWT to find a suitable vantage point and start shooting. The head warden for the day points us in the right direction for capturing the birds on their way out and back again.
The readers position themselves with the sun at their backs and set up their camera gear. All the participants brought their own cameras and lenses with zooms of 300mm or over. This is the very minimum according to Paul ? any less and you don?t stand a chance of getting a close-up image with impact. ?Do, however, bear in mind the crop ratio of your sensor: a 1.6x crop will turn a 300mm lens into a 480mm optic, which will be perfect for capturing a bird in flight,? he says.
Paul is using a full-frame Canon and emulates this crop ratio with the addition of a 2x teleconverter, something he recommends if you?re in the same situation.
WWT Slimbridge
- Location
Situated between Gloucester and Bristol, just a matter of minutes from the M5, Slimbridge is easily accessible by both road and rail. Slimbridge was the first WWT centre to be opened back in November 1946, by artist and naturalist Sir Peter Scott. The reserve covers more than 3km2 and is home to a variety of species, which can be observed from some 16 hides. The centre also boasts a gift store and restaurant, as well as the hire of binoculars. Contact Slimbridge WWT, Slimbridge, Gloucestershire GL2 7BT. Tel: 01453 891 900. Email: enquiries@wwt.org.uk.
- Opening Times
The centre is open seven days a week, 364 days a year. Between November and March the centre is open 9.30am-5pm (last admission 4pm), while between April and October the centre is open 9.30am-5.30pm (last admission 4.30pm).
- Admission charges
Adults £10.35, concessions £7.95, child (4-16 years) £5.60, family (two adults, two children 4-16 years) £28.95, Children under four years free.
- Workshops
Slimbridge hosts a range of activities, covering everything from arts and crafts to photographic days. For more information visit www.wwt.org.uk/visit-us/slimbridge/events, or call 01453 891 223
Your AP Master?
 Paul Hobson
Paul studied environmental science at Sheffield University and has worked as an environmental sciences lecturer for 25 years. With more than 20 years? photography experience behind him, Paul was specially commended in the 2008 Wildlife Photographer of the Year competition and two of his images were exhibition finalists in the British Wildlife Photography Awards 2009. Paul regularly lectures on wildlife photography and also runs workshops. www.paulhobson.co.uk
The readers
 Dave Hall
Olympus user Dave is recently retired and enjoys entering photo competitions. Dave used an Olympus E-5 and 300mm prime Zuiko lens. ?Outside of wildlife photography, I also enjoy landscape photography,? he says. ?I learned a great deal from the day and feel it has improved my wildlife technique.?
 Lesley Key
Lesley is a technical assistant and another Canon user. She brought both an EOS 7D and 50D to Slimbridge, with a 100-400mm Canon lens. ?I was surprised by the amount of good images I captured. Paul is a fantastic teacher and I really found his advice helpful,? she says.
 Zakir Khan
Zakir, an IT consultant from Oxford, shoots with a Canon EOS 20D and 70-300mm Canon lens. He likes to use photography as a means of expression and as a way to tell a story, letting his images do the talking. Outside of wildlife, Zakir cites reportage as his other main photographic interest.
 Jay Martin
Engineer Jay is a local to Slimbridge, hailing from nearby Stroud. Jay shoots with a Canon EOS 400D and utilised a 300mm Sigma lens on the day. ?I use my photography to convey ideas visually,? says Jay. ?Wildlife photography isn?t my preferred subject matter, but I found the day ignited an interest in the area.?
Would you like to take part?

Every month we invite three to five AP readers to join one of our experts on an assignment over the course of a day. If you would like to take part, visit www.amateurphotographer.co.uk/masterclass for details of how to apply. You will also be able to read many of the previous Masterclass articles from 2010. Please remember to state which subject you are interested in and make sure you include your name, address, email address and daytime telephone number in your application. Each participant will be able to use his or her own camera, lenses and other equipment.
The day may have been challenging at times, but all four readers came away with some great images to show for their efforts
Choosing the right lens

Choosing the right lens
Whether at a wetlands centre or out in the field, birds in flight will pass by at great speed and at quite a height. As a result, Paul encouraged the readers to use the largest lens they had. If you can?t afford to invest in a lens outright, there are plenty of places to hire good-quality optics. Rates for a 400mm lens can start at £60 for a seven-day loan, which is perfect for a wildlife break.
 Checking the histogram
The histogram is a useful tool for judging your exposure because relying solely on the image on your LCD screen has its limitations. In bright-light conditions it can be difficult to see if you?ve lost detail in the shadows and highlights. ?If you?re comfortable using it to gauge your exposure, the histogram is a very effective tool,? says Paul. ?The distribution of peaks and troughs will show just how evenly exposed the image is.? Almost all DSLRs will offer the option of switching on the histogram in image review, while some will even allow you to add it while shooting, if you?re using live view.
Aperture Priority
Aperture priority
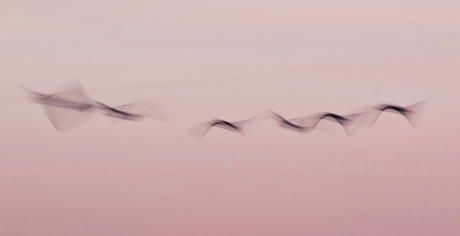
Paul suggests the readers work in aperture-priority mode when exposing their images. ?I always shoot in aperture priority,? says Paul. ?In that way, you ensure you are getting the fastest shutter speed possible, which will in turn ensure that you?ll produce sharp images and freeze the action of the bird in flight.? As a rule, Paul also recommends setting the ISO sensitivity to 400 to keep the shutter speeds fast. A lower sensitivity could result in a longer shutter speed that leads to blurry images, although this can create some interesting effects, as Dave?s image on shows.
Continuous Shooting
Another setting Paul recommends for photographing birds in flight is continuous shooting mode. ?It?s hard enough to get a bird in flight in the frame, so to maximise the chance of getting a sharp image use continuous shooting mode,? he says. Investing in a card that has a fast write speed can also speed up the image-capture process.
Seasonal lighting

Seasonal Lighting
?Winter is my favourite time of year for shooting birds in flight?, adds Paul. ?As the sun is low in the sky, it serves to light up the bird from both the side and underneath, and this can produce some really striking results.? When choosing your vantage point, consider where the sun is. On the day, Paul and the readers stood with the sun behind them to give them the greatest opportunity for using the light to create a dramatic image. Also, don?t pack your camera gear away until the last rays have faded as you may be able to produce some atmospheric shots as the day draws to a close. Dave, in his image, even manages to incorporate the moon into his composition. Snow, if there is any, may offer wonderful uplighting on a bird in flight so don?t be put off by snowy conditions ? use them to your advantage.
Track the Subject

Track the Subject
A tip that Paul was keen to impress upon the readers was never to stop tracking the birds, even when they are flying overhead and seemingly away from a good photographic opportunity. ?Even when the bird has flown right overhead or off to one side, don?t stop tracking it and firing off images,? says Paul. ?An image captured from right under the bird can be particularly striking, and one that most photographers overlook, thus giving you a unique point of view.?
Use a Tripod or shoot handheld?

Use a Tripod or shoot handheld?
Photographing a moving subject involves being mobile with the camera, and this often means taking it off the tripod. However, there are occasions when using a tripod is preferable. ?In positions where the birds are flying in the distance and on a horizontal plane, it can be useful to track the bird with the camera on a tripod,? says Paul. ?If this is the case, a ball-and-socket head is the best option, with the resistance set to a strong enough level to support the lens and camera. More often than not, though, it is best to shoot handheld as this allows you to react quickly to the scene as it changes.? Shooting in a hide can be perfect for tripod work, as you may find the axis on which you can move the camera when shooting handheld is limited.
Metering modes

Metering Modes
Paul advises the readers to keep to one metering mode, and in his case it?s centreweighted, although he doesn?t say that this is the metering mode they should use. ?Whichever metering mode you decide on, be sure to stick to it,? he says. ?In this way, you learn how your camera behaves in certain conditions, and you?ll spend less time fiddling with the settings.?
Be willing to Adapt
?I find that, even with more than 20 years? experience of photographing birds, I?m constantly evolving my style and learning through listening to other photographers in the field,? admits Paul. ?Try not to get stuck in one style. If you do, you may become complacent in your bird photography and end up with the same images.?
Exposing for White and Black Birds

Exposing for White and Black Birds
Paul shared a general rule of thumb that he uses for shooting black and white birds in flight, both of which can cause issues with exposure. ?I tend to set my camera to overexpose, via exposure compensation, for white birds and to underexpose for black birds,? he says. ?Most cameras will do the opposite as a default, so it?s best to try to account for this in advance.? Knowing your camera is key when it comes to getting a good image. ?Use this as a guide, and see what results your camera produces and adapt to suit,? he adds.
Focus modes and methods
Paul suggests the readers take their cameras off continuous focus mode. ?If you use this setting then the camera will hunt for focus,? says Paul. ?Set it to single focus and pick an object on a plane near to where the birds are likely to fly and focus on it. When your camera begins focusing it will be near enough to where it needs to be, and will spend less time hunting for the correct point of focus.?


